Creating Driver Discounts
Driver discounts allow Site Hosts to offer reduced charging rates to specific groups of drivers, such as employees, tenants, or fleet members. Discounts are created and fully managed in the Site Manager portal.
All discount management is done in Site Manager, including approving driver requests, removing drivers, and deactivating discounts. Existing site partner discounts can be attached to locations via the Lynkwell Network Manager.
Getting Started
- Log in to the Site Manager portal
- Navigate to the
Driverstab in the top navigation bar - Under the
Discountssection, click the+ Create New Discountbutton
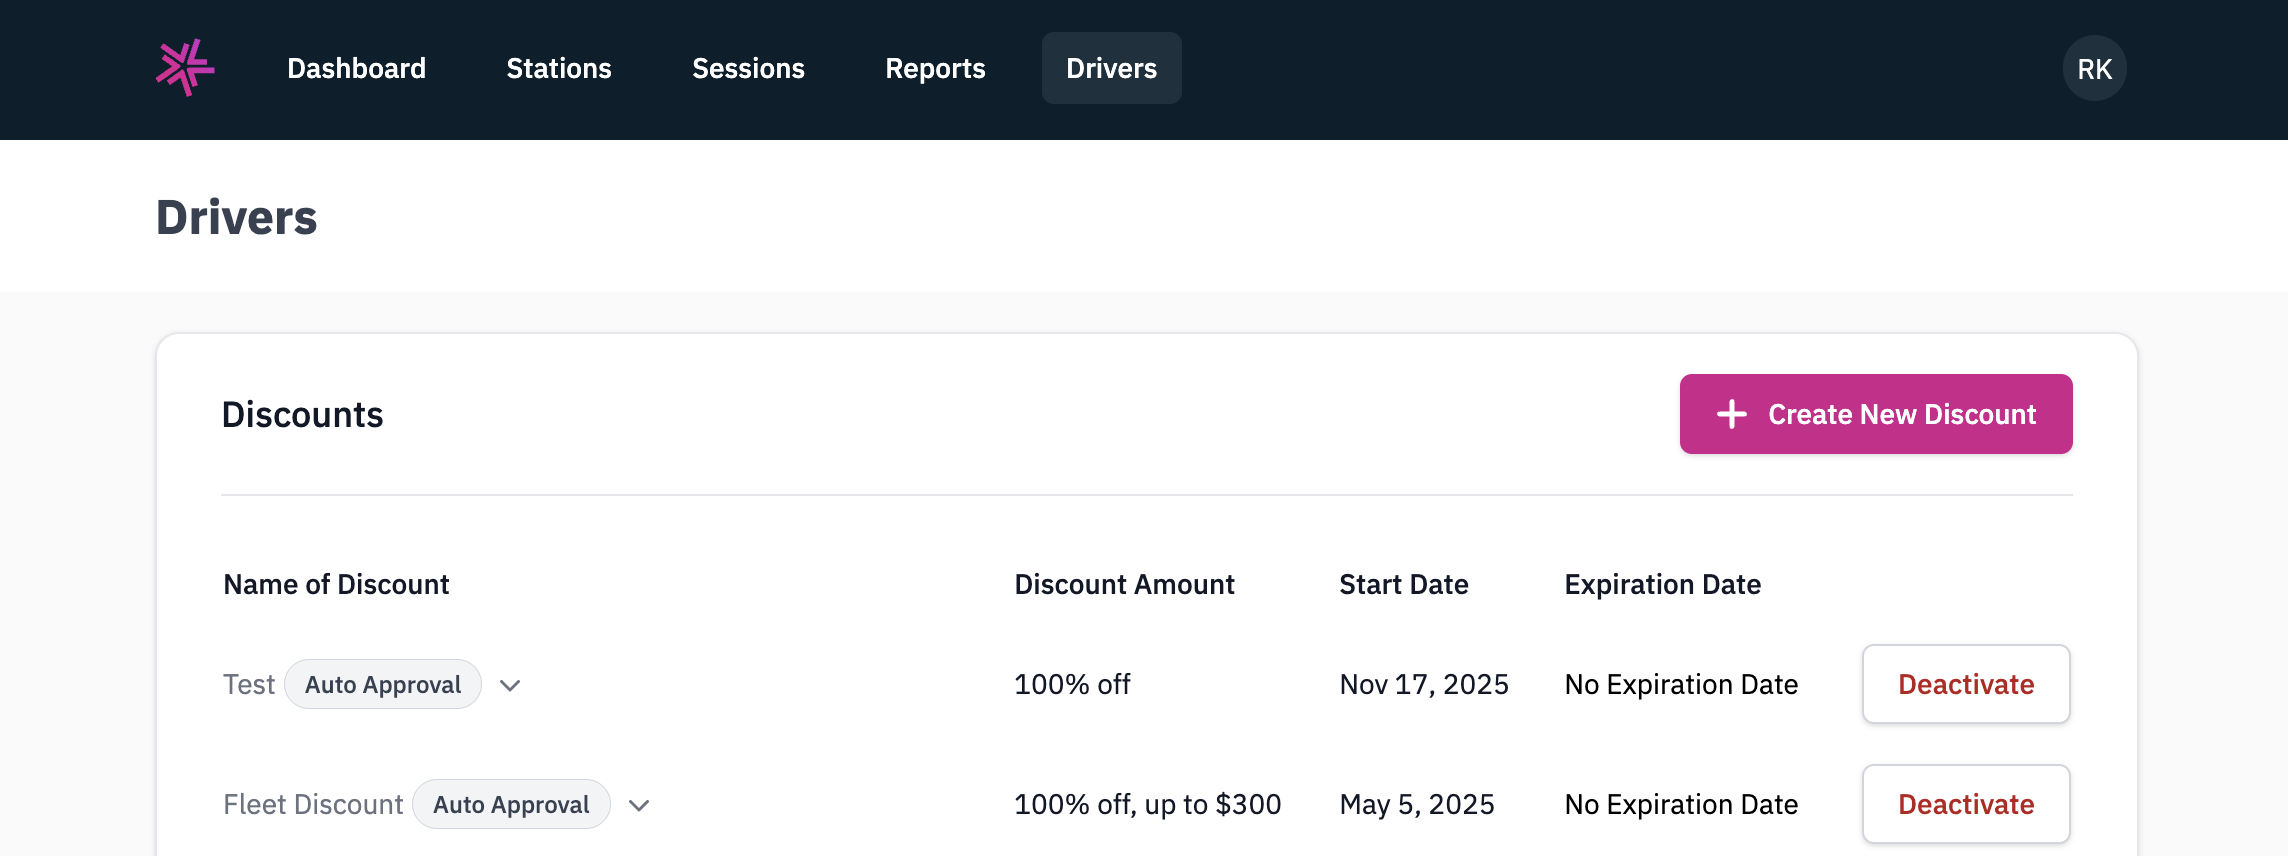
This will open the Create Discount modal, which consists of four steps.
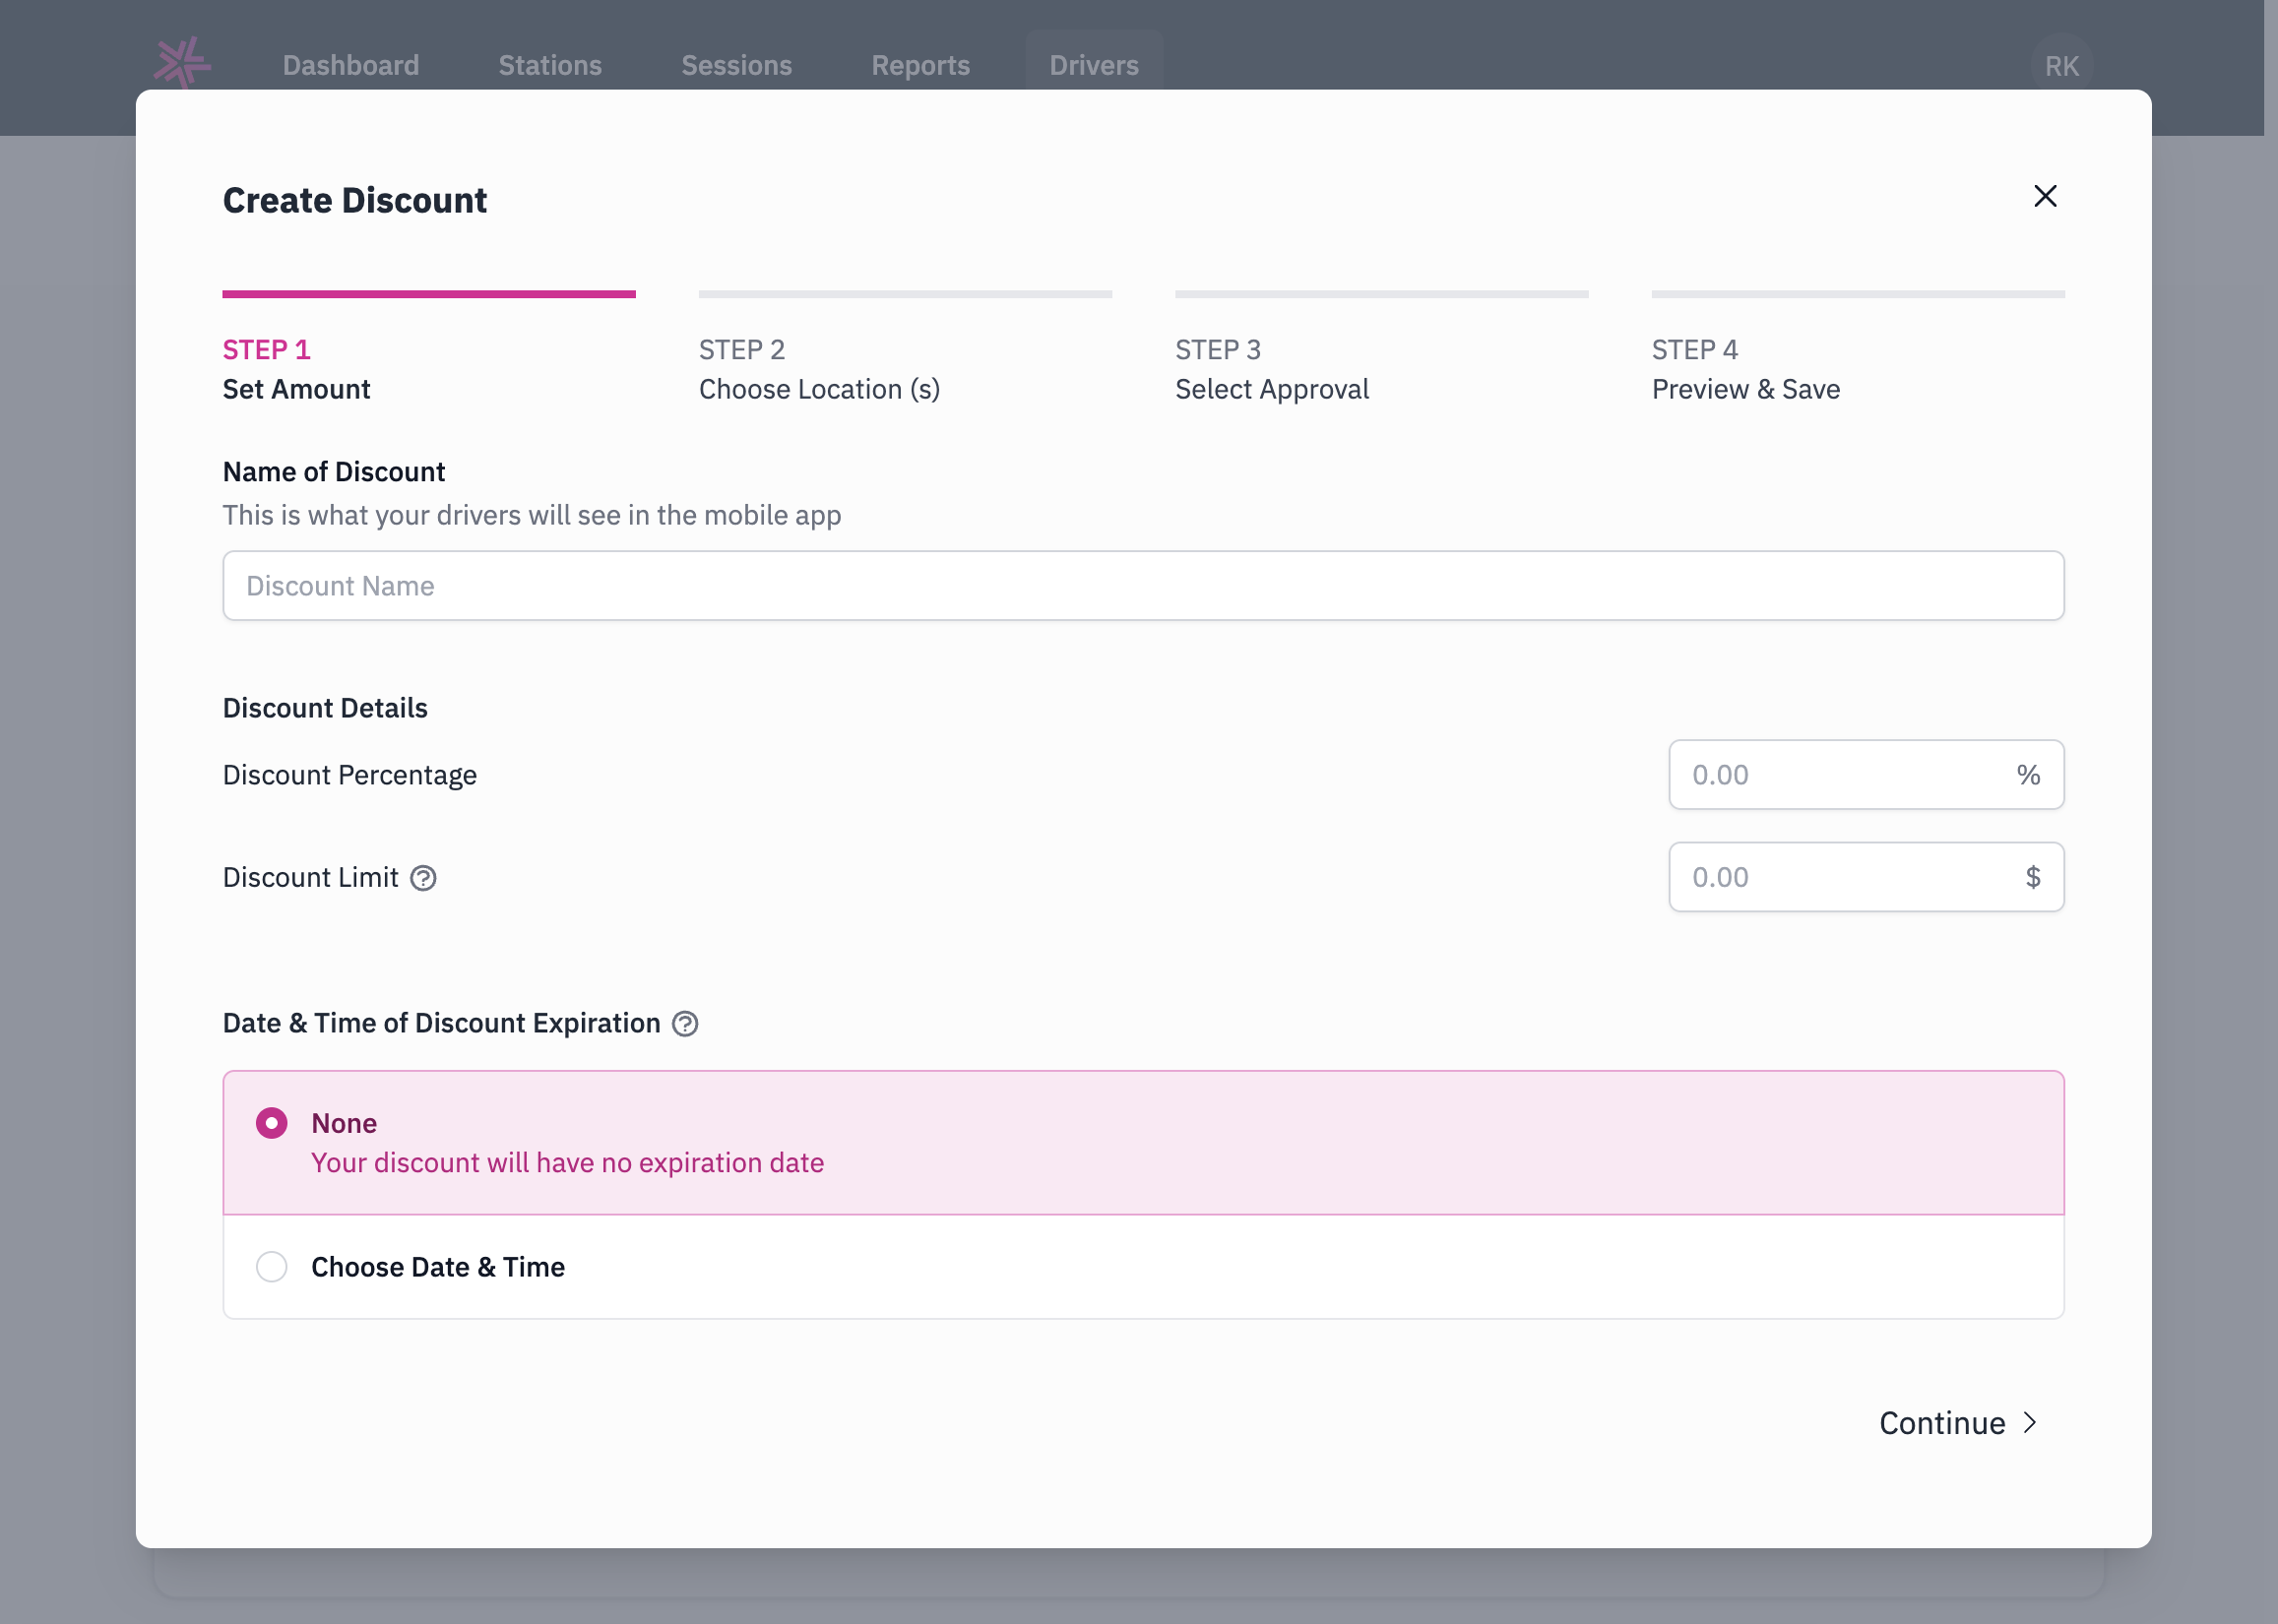
Step 1: Set Amount
In this step, you will configure the discount details.
- Name of Discount -- Enter a name for the discount. This is what your drivers will see in the mobile app.
- Discount Percentage -- Enter the percentage off (e.g.,
100for 100% off). - Discount Limit -- Enter the maximum dollar amount the discount can cover per session (e.g.,
5.00for up to $5). - Date & Time of Discount Expiration -- Choose whether the discount expires:
- None -- The discount will have no expiration date.
- Choose Date & Time -- Set a specific expiration date and time.
Click Continue to proceed.
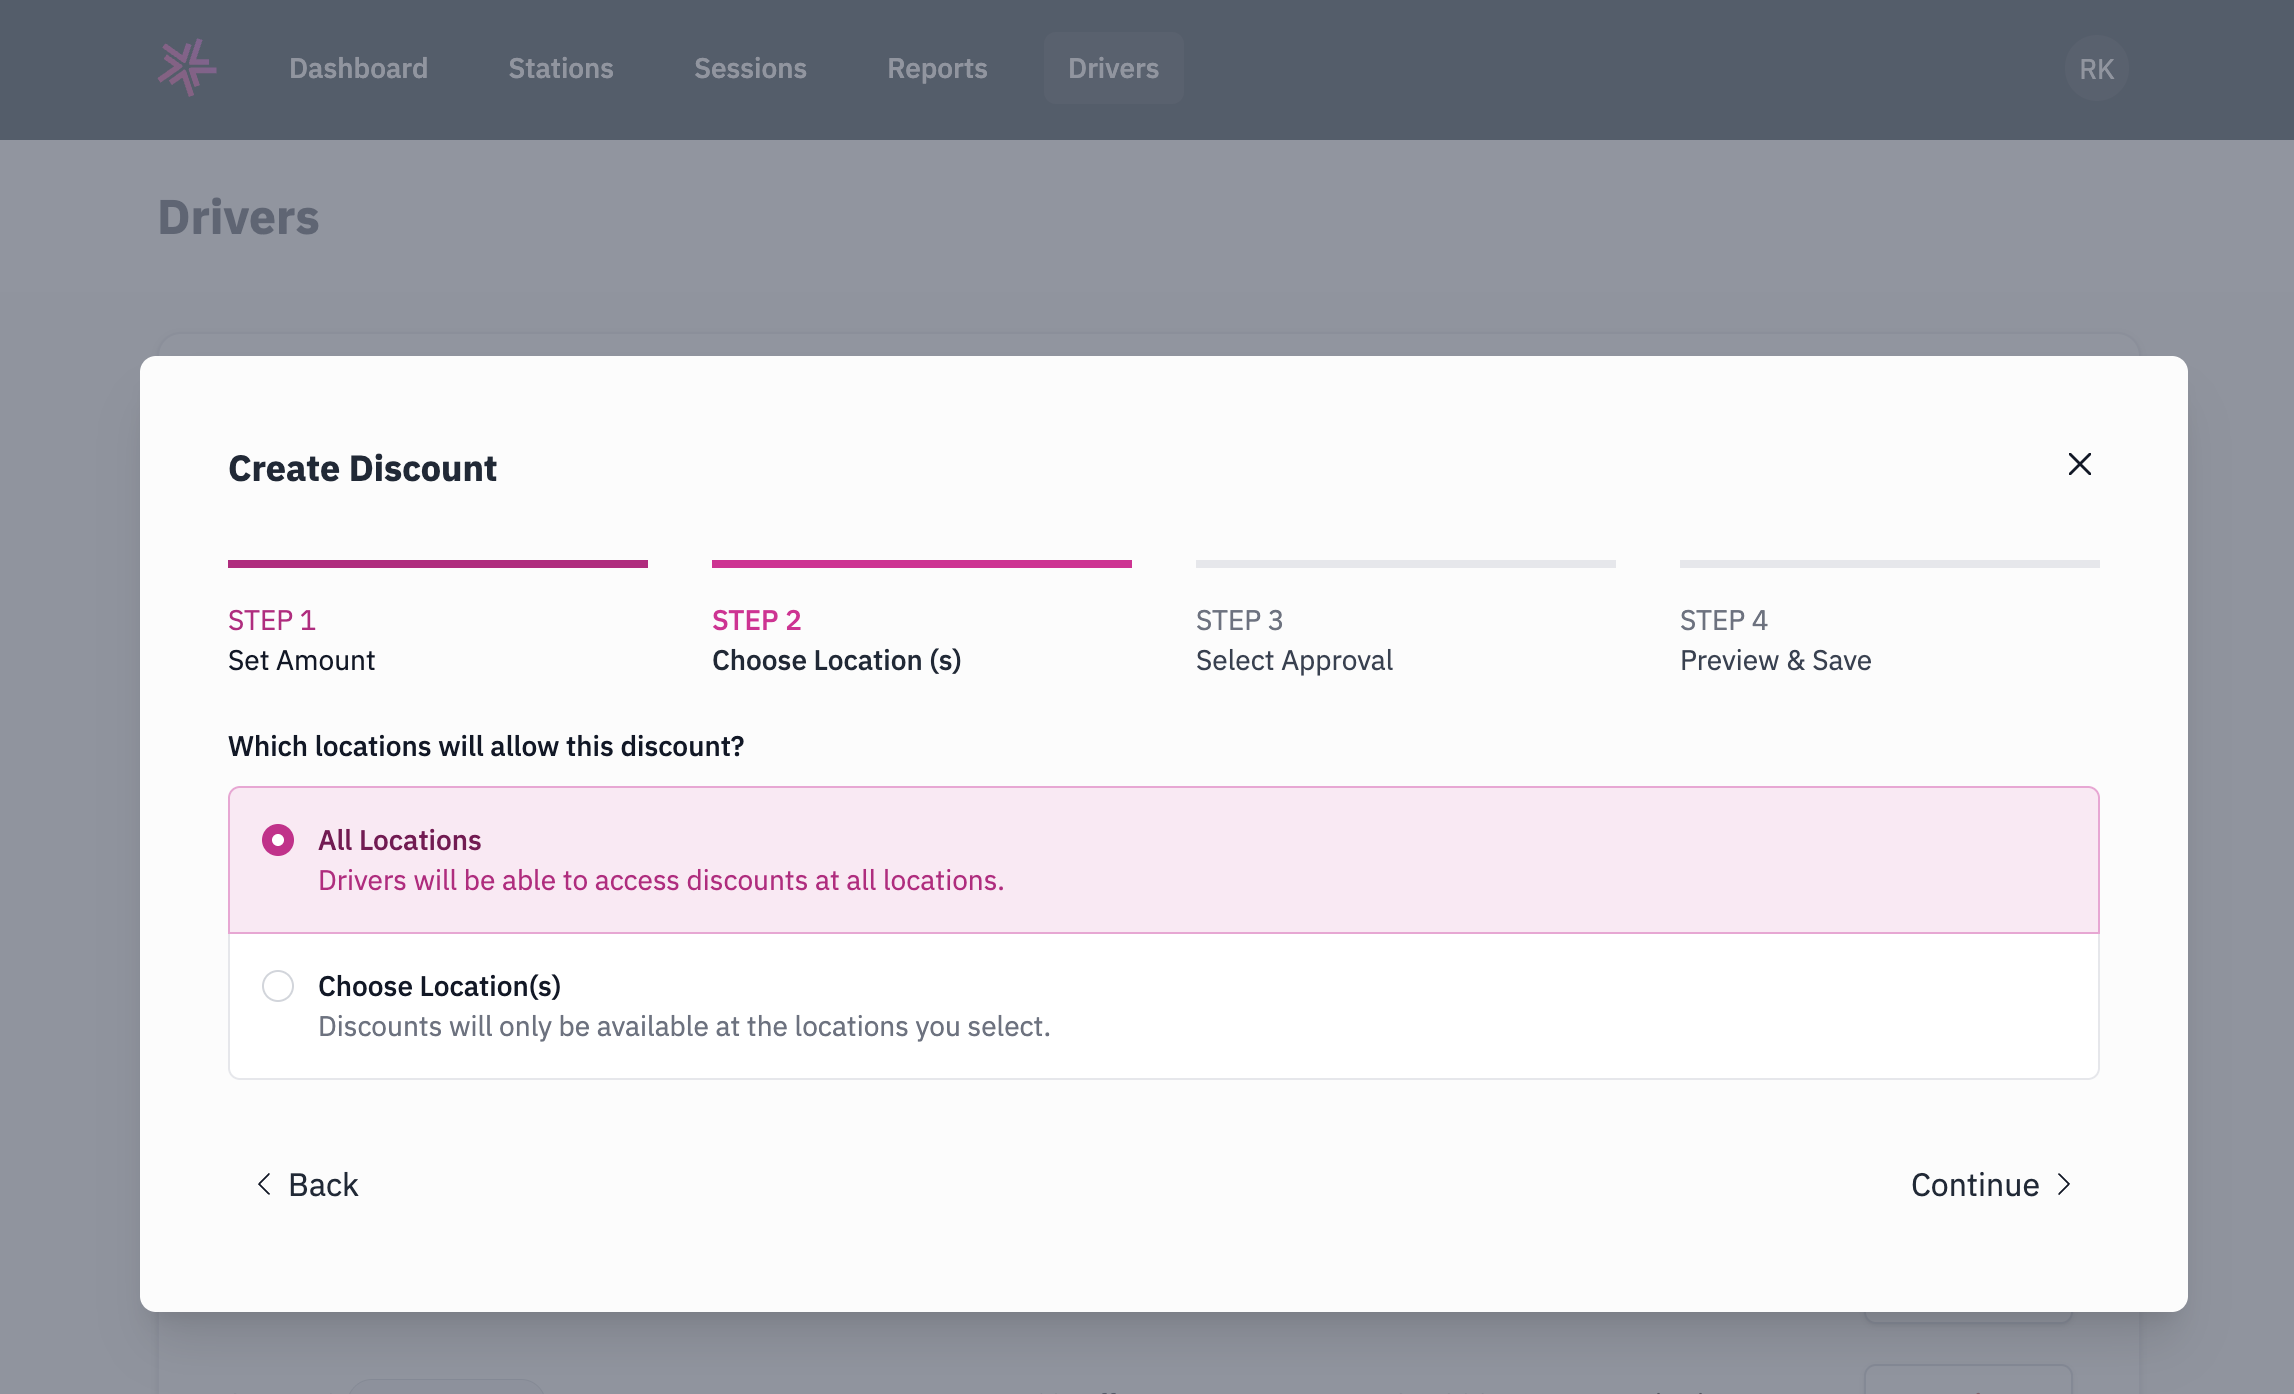
Step 2: Choose Location(s)
Select which locations will honor this discount:
- All Locations -- Drivers will be able to access discounts at all locations.
- Choose Location(s) -- Discounts will only be available at the specific locations you select.
Click Continue to proceed.
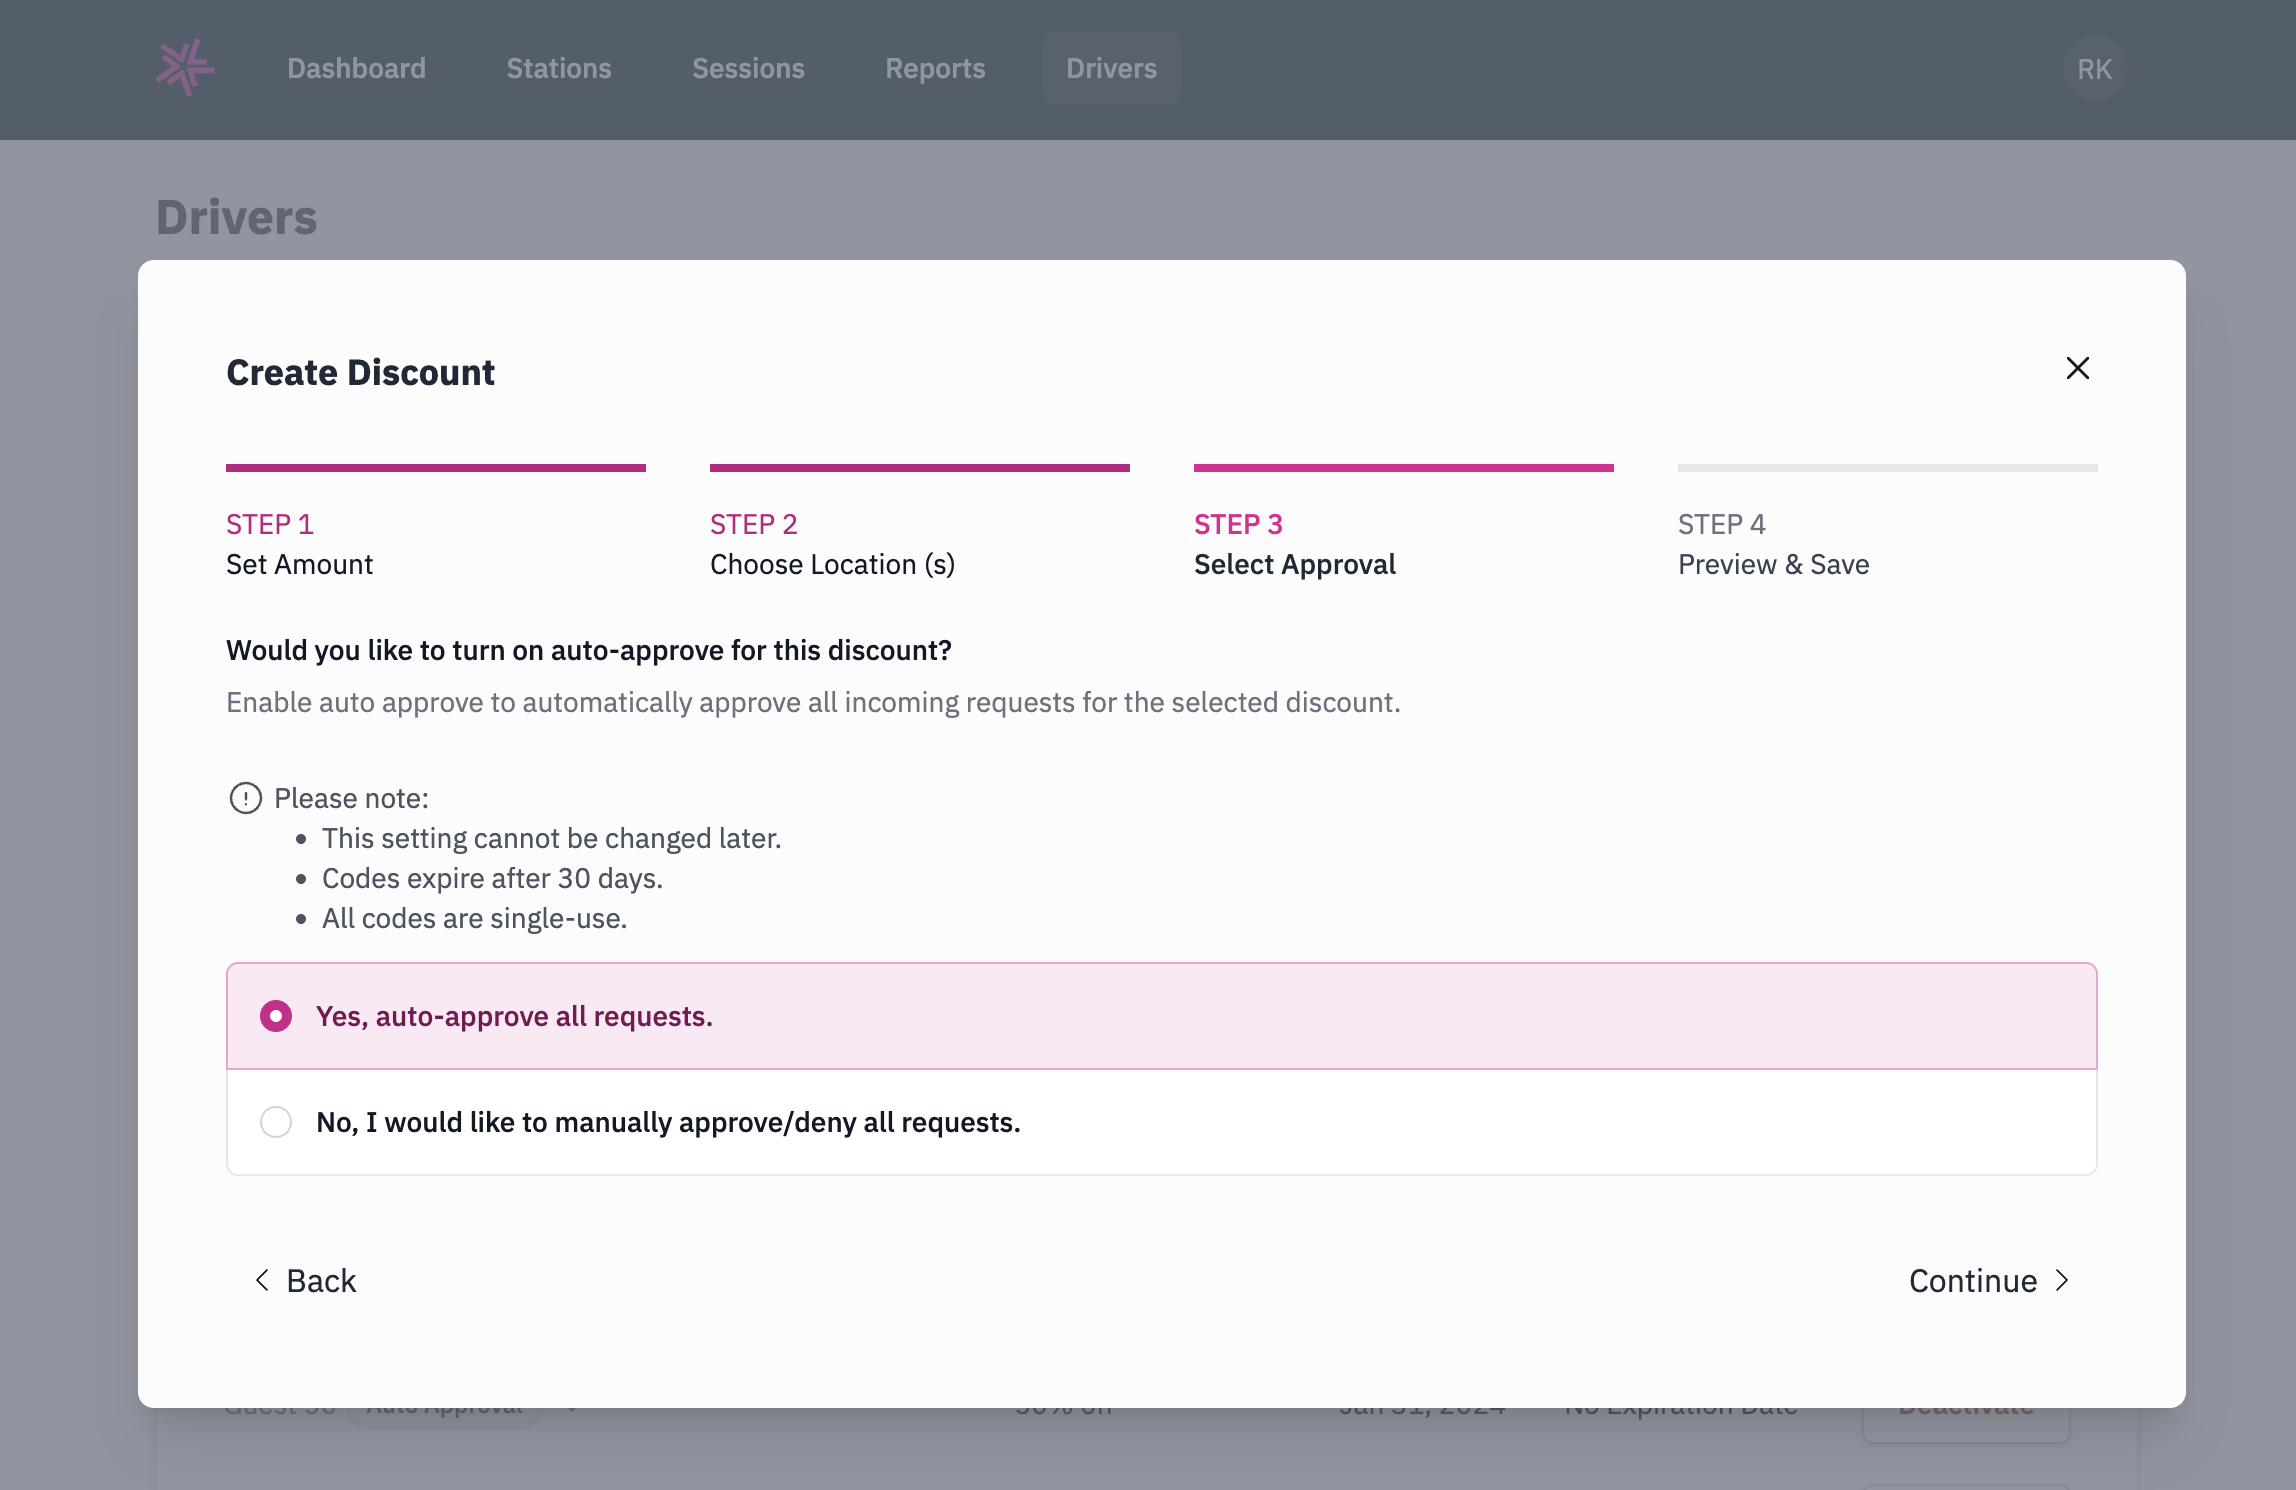
Step 3: Select Approval
Choose how driver discount requests are handled:
- Yes, auto-approve all requests -- All incoming requests for the discount will be automatically approved.
- No, I would like to manually approve/deny all requests -- You will need to review and approve or deny each driver's request individually in Site Manager.
Please note:
- This setting cannot be changed after the discount is created.
- Codes expire 30 days after the date of generation.
- All codes are single-use.
Click Continue to proceed.
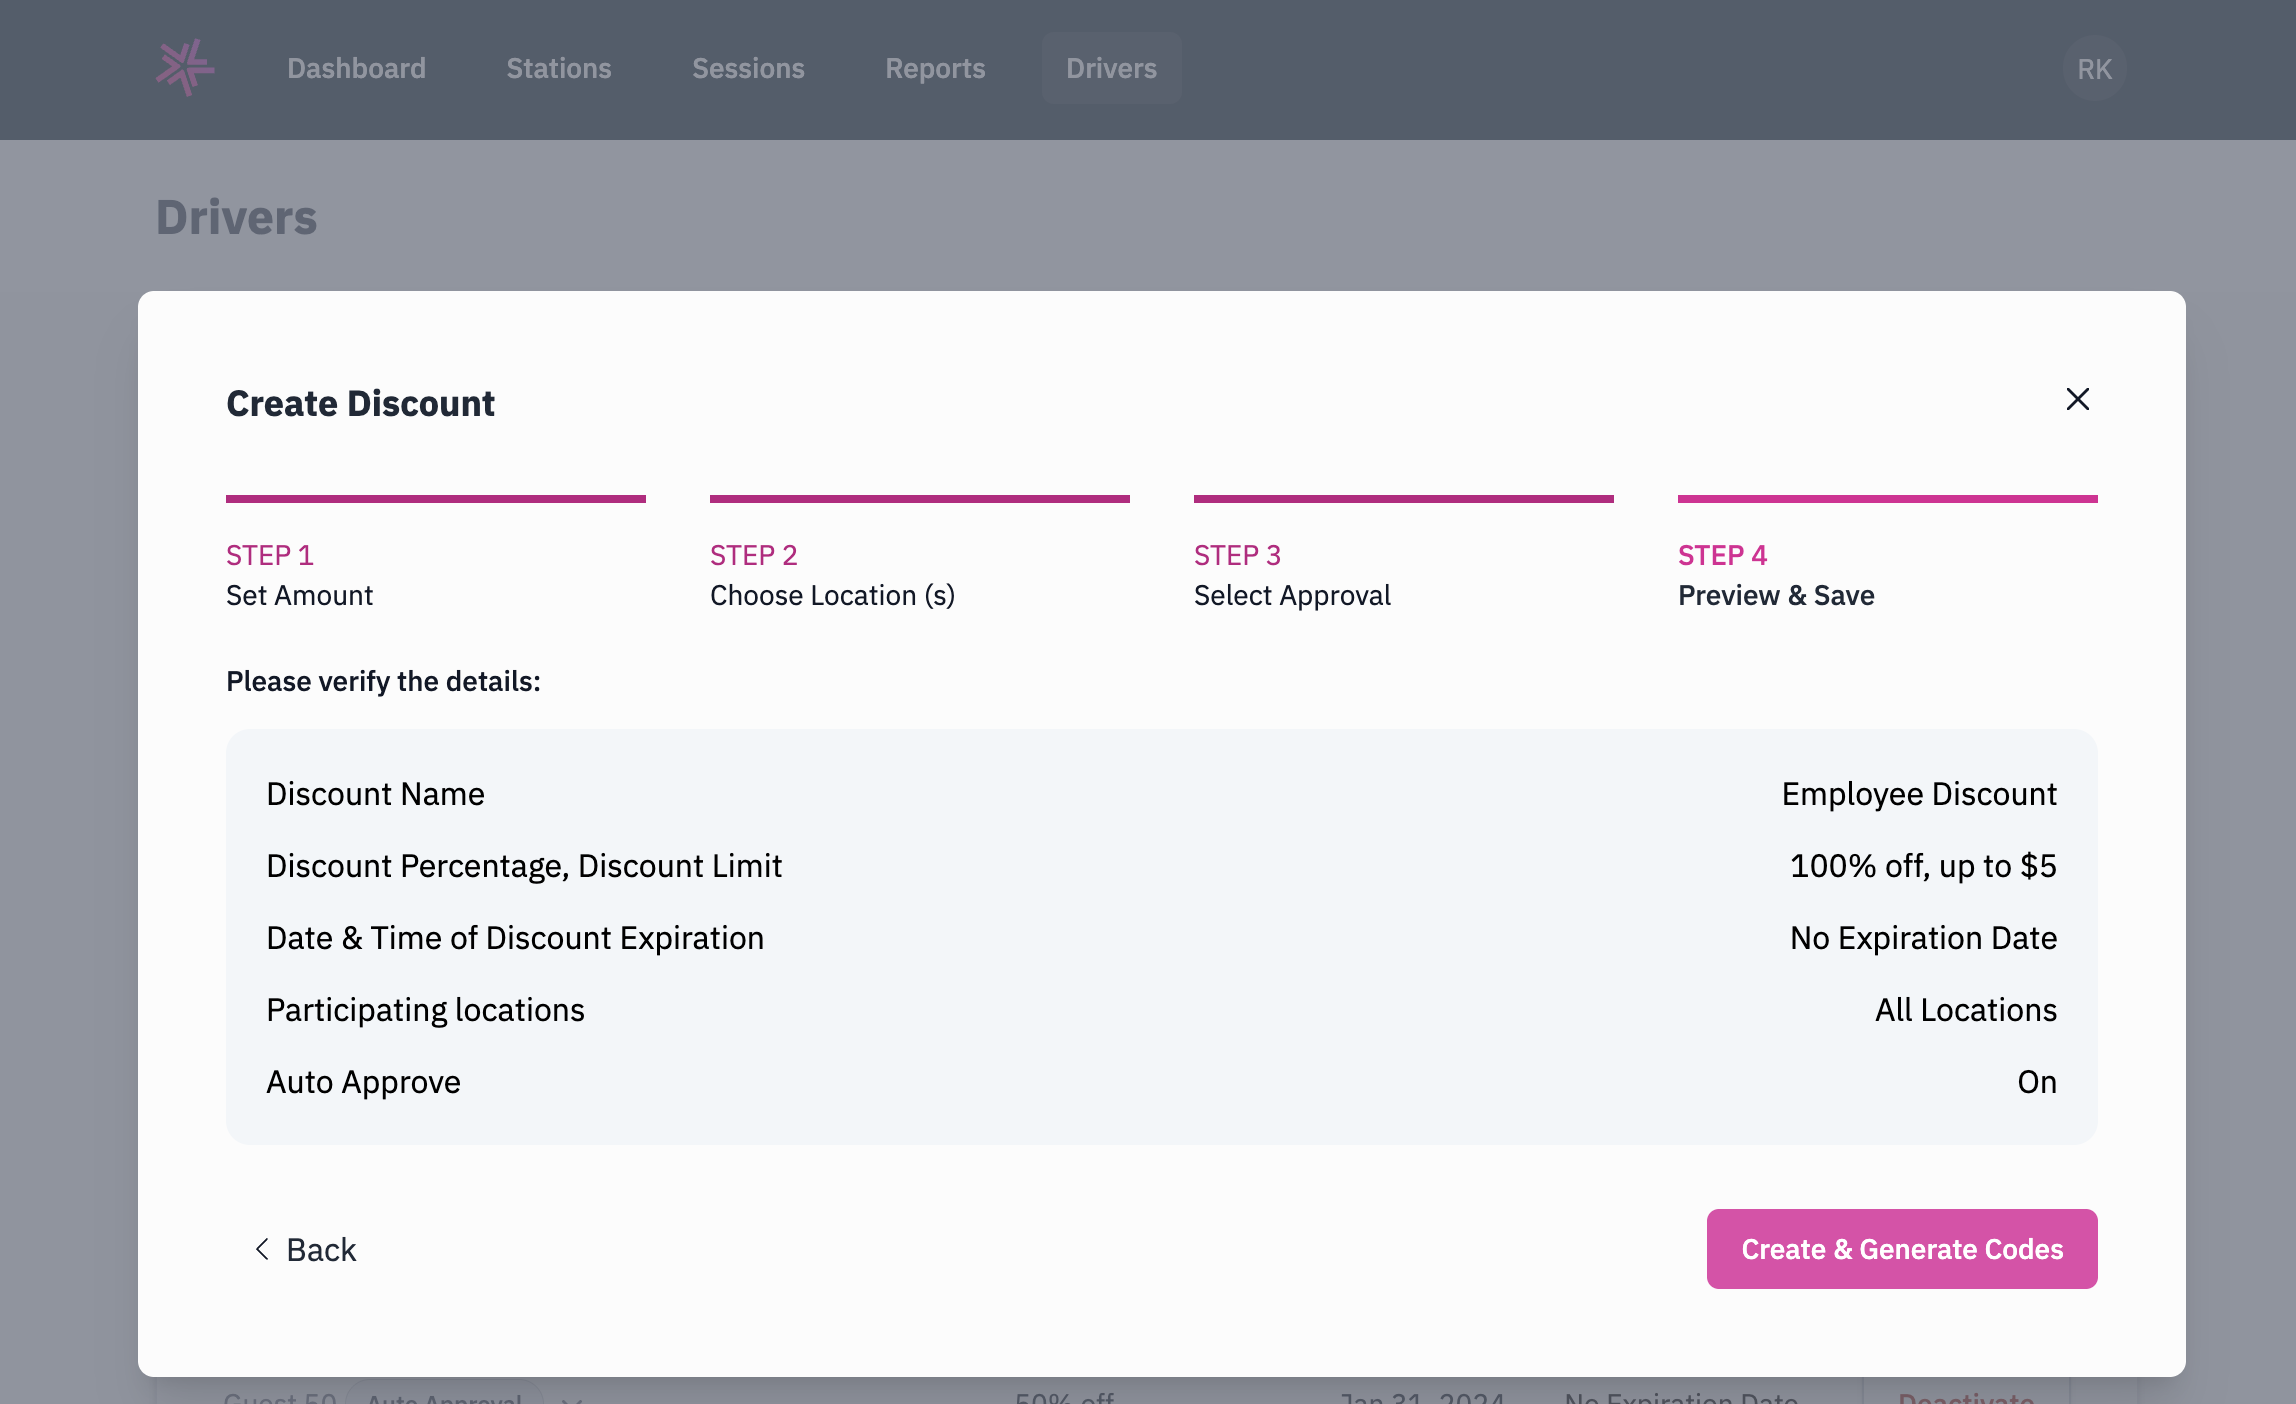
Step 4: Preview & Save
Review all of the discount details before finalizing:
- Discount Name
- Discount Percentage and Discount Limit
- Date & Time of Discount Expiration
- Participating Locations
- Auto Approve setting
Once you have verified the details, click Create & Generate Codes to create the discount.
Generating and Downloading Invite Codes
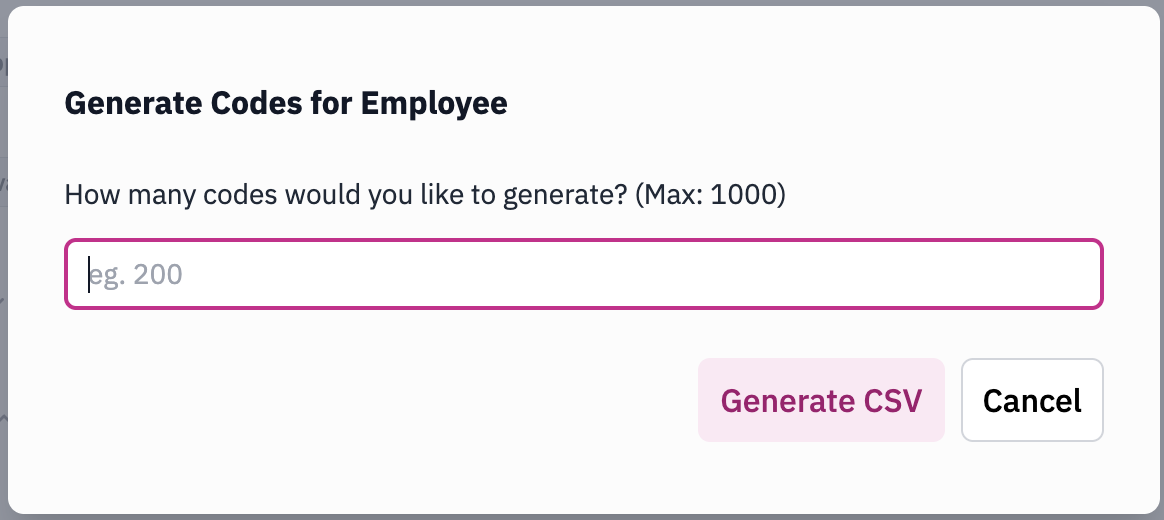
After creating the discount, you will be prompted to generate invite codes.
- Enter the number of codes you would like to generate (maximum of 1,000).
- Click
Generate CSV. - A confirmation dialog will appear with a link to the generated CSV file. Click
Download CSVto save the file.
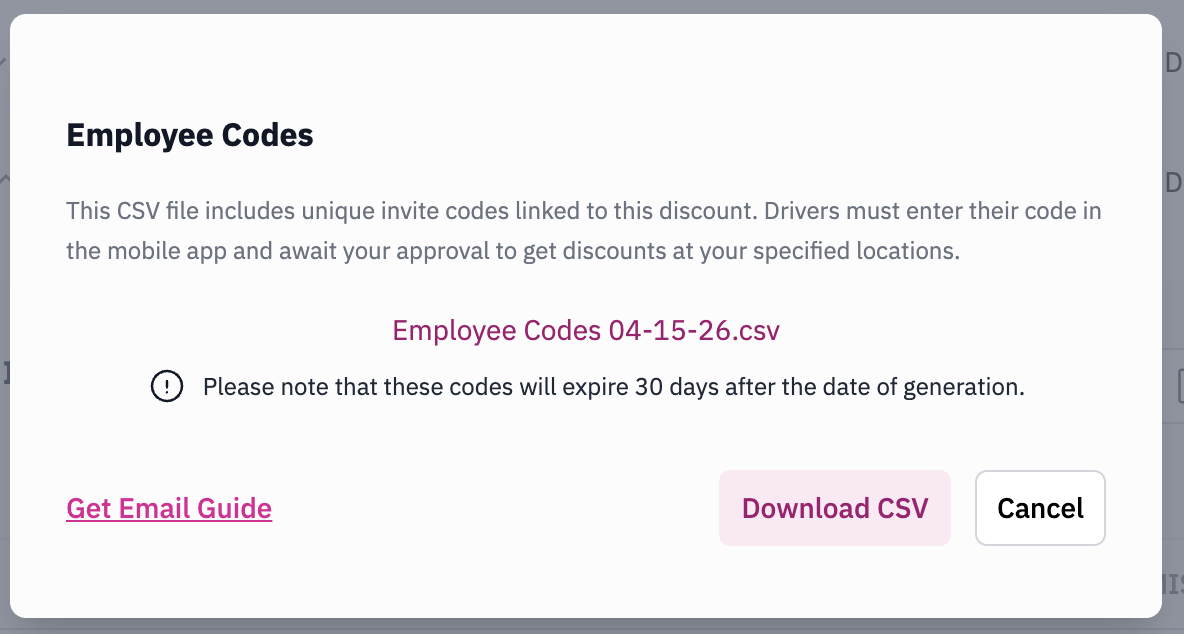
Codes expire 30 days after the date of generation. You can generate additional codes at any time from the discount's detail page.
You can click Get Email Guide for a pre-written email template to send to your drivers.
Distributing Codes to Drivers
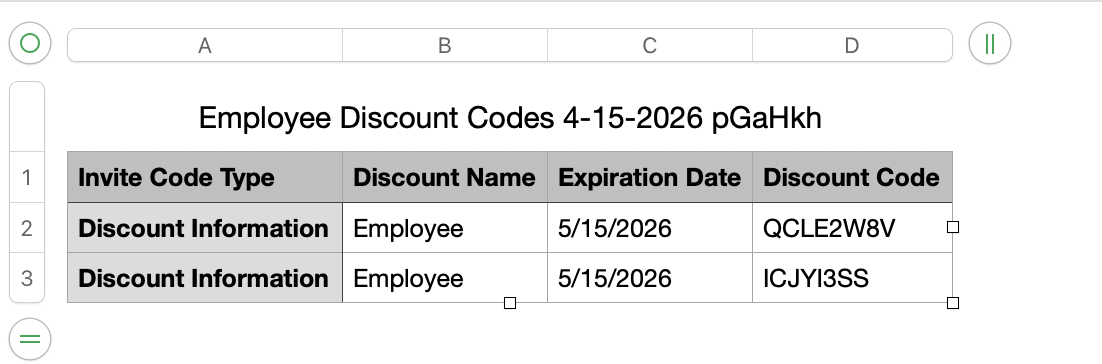
The downloaded CSV file contains the following information for each code:
| Column | Description |
|---|---|
| Invite Code Type | The type of code (e.g., Discount Information) |
| Discount Name | The name of the discount |
| Expiration Date | When the code expires |
| Discount Code | The unique code to share with the driver |
Share individual discount codes with your drivers. Drivers will enter their code in the mobile app to request access to the discount. Depending on your approval setting, requests will either be auto-approved or require your manual approval in Site Manager.
Related Guides:
How Drivers Can Request Access to Discounts
A guide for drivers to request discounts through the mobile app